By: First12Go
|
Well where do I begin...
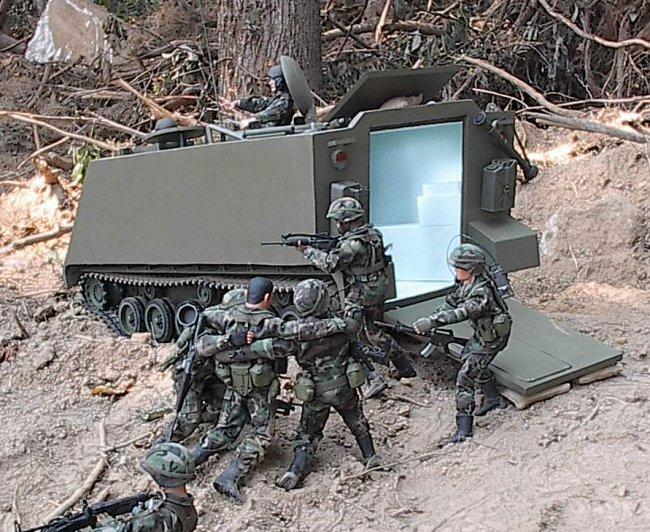
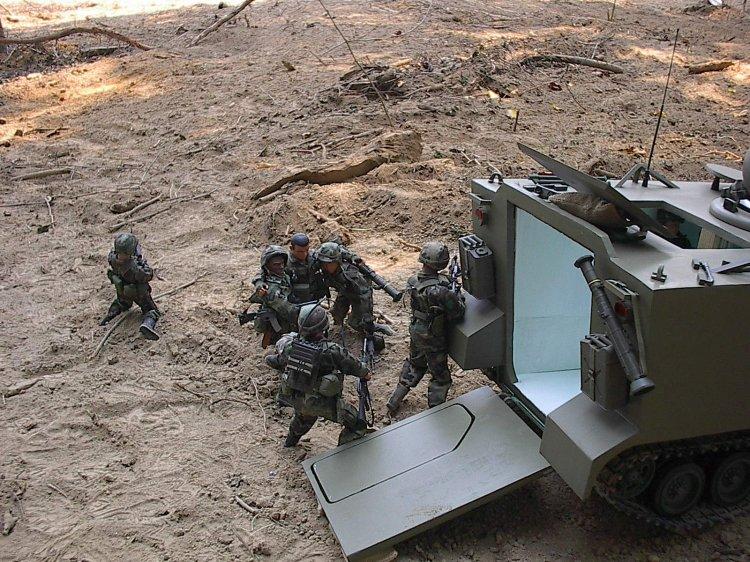
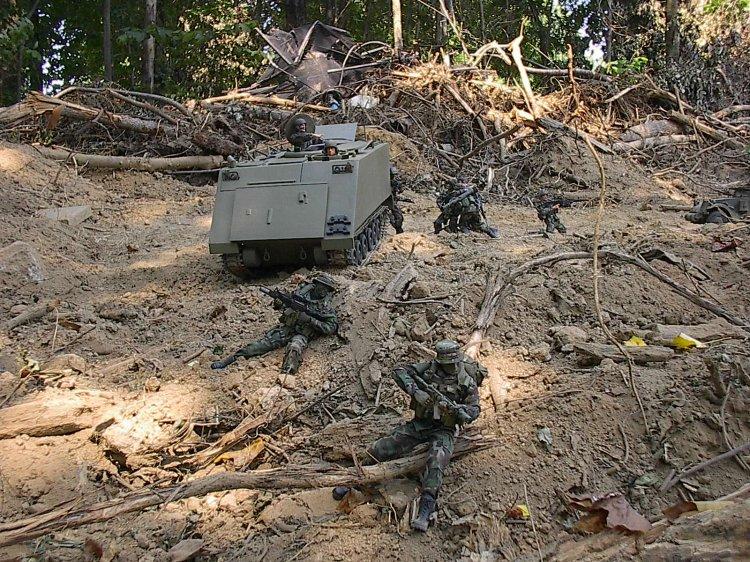
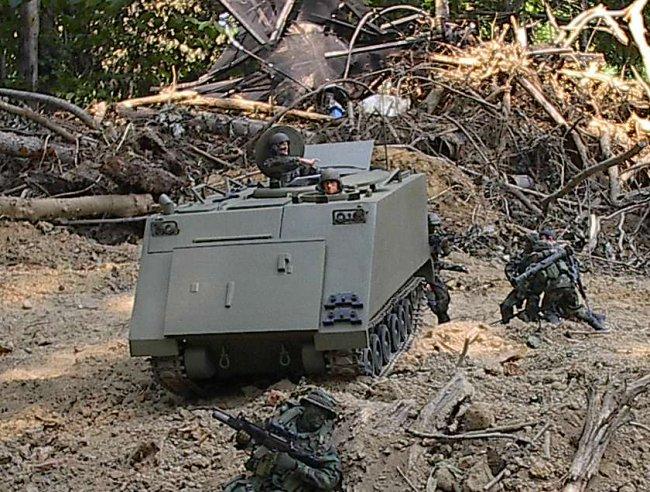
Find a model (if possible) as big as you can get. This will make it easier. I started with a TAMIYA 1/35th scale model I had already built. I used the standing figure that came with the kit and began measuring height x width x length, then took a 12" inch figure and measured on 1/2" inch plywood the same number of body length(s) to get the size of each panel. I used a jigsaw (all I had) to cut out the panels and sanded each panel and filled all imperfections with elmers wood putty. I let dry and finish sanding all panels untill I was happy with the finish. Then I primered all panels (both sides). I then began to assemble with coarse drywall screws and countersinking all screw holes, to later be filled with putty. After I got the thing square I used carpenters wood glue (worked pretty good but found this WELDBOND that glues almost anything to anything) and began gluing and screwing, constantly checking to make sure it was as square as possible. After all that I made interior walls separating engine compartment from crew compartment, gluing and screwing as I went. Now that I had the basic shell formed it was time to let that dry and start figuring out how I was going to make the tracks, road wheels, idler wheel and drive gear. After months of experiments and more failures I knew the Bradley was due out so I started reconing to find one. Found one at TOYS R US that kids had gotten into (it was on floor) and had broken alot of pieces off of the thing and thought perfect! Ended up only paying 100.00 dollars for the thing tax included. Now I had my complete chassis, lights and light bars, lift hooks, spare track links, track changing tools, steel towing cable, interior parts and such. I got it home and tore it apart to get what I needed. Ok now I had to start looking around the house and garage to find the thing I needed to finish the finer details of my monster. Oh by the way it weighs about 60 lbs or so transporting is real fun, it takes 2 people to load it in a car or truck. Simple details were made from simple things like the exhaust stack was from 1/2" pvc cut at 15 degree angles to make a 30 degree bend. The intake and radiator grills were made from popsicle sticks and a 45 degree angle jig I made. All hinges were made from popsicle sticks, handrails on top are from 1/4 scale 6x6s from the hobby shop, minor brackets are from 1/16th sheet styrene from the hobby shop. I turned the cupola and commanders hatch out of a 2x6 on a wood lathe that was given to me. The sight glasses are from 3/16th smoked plexiglass and the backs are wood cut sanded and glued together then painted (all before assembly to the chassis). I'm rereading this and making it sound so easy but believe me I went through alot of wood and glue from trial and error. Lots of errors but don't get discourged. Walk away or work on making some other part. I used commanders hatch off of Tamiya model for the gas gap, rear lights came off the Mutt Jeep trailer I had bought, chain and cover is a necklace and some heatshrink tubing, battery box, cargo hatch and fuel tank are from 1/4" plywood,and so on and so on. Everything works (within reason) all hatches open and close, commander's cupola turn 360 degrees, breakwater plate opens and then you can open the engine door and then lift up the engine cover and lock it onto the support bar laying beside the cupola ( this one piece was made from a corn dog stick, it's longer than a popsicle stick),back ramp opens and also the door in the opens. My particular model will house a TOW unit that will retract into the crew compartment to match the TOW converted mutt jeep. I used flat mint green paint on the interior,(closest match to duck egg blue) from Wal-Mart and PRO MODLER MONOGRAM Olive drab (FS34088) from hobby shop, of course add appropriate figures in correct attire and you have one hell of a static display. Holler at me somtime and tell me what you are wanting to do and I'll help if I can , I had alot of fun building it and still have more to do on it. first12go@aol.com |
| Wow! Outstanding work here soldier. This has to be one of the most impressive Modern projects I've seen in a long time. I'm drooling all over the place here just looking at it. That's one great looking armored personnel carrier for sure. You're a lucky man to be able to build and own such a piece. Special thanks for sending it in and sharing it with us. -- GL |

Back to the Photos