By: BC Ries
|
Here is a tutorial about making japanese Ammunition crates, The dimensions can be changed to suit your
needs or availability of materials. The design is based upon old photographs and is typical of the
appearance of Japanese ammunition crates used to hold ammunition. |
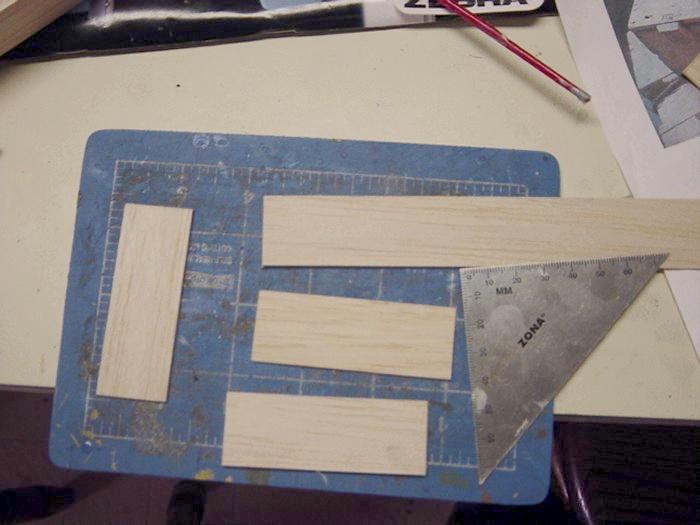
| This is 1" wide x 1/16" thick balsa wood I got a piece about 2 feet long for $1.25. Cut 4 pieces 2-3/4" long and 2 pieces 1-1/8" long. |
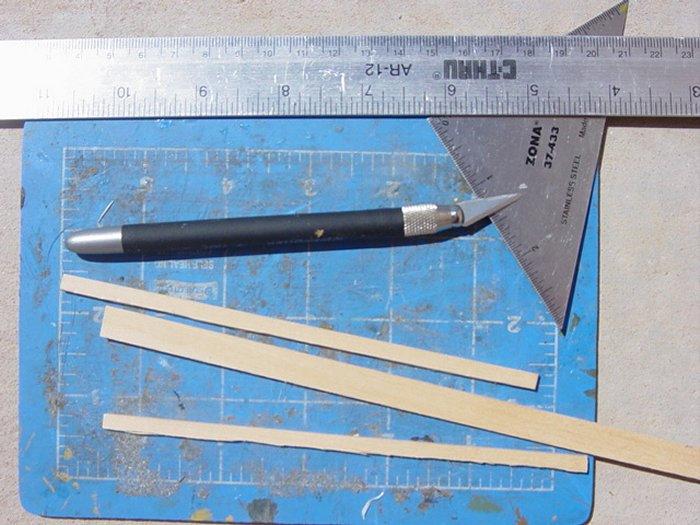
| Here is some 3/8" x 3/32" balsa I split it to make 3/16" x 3/32" pieces You will need 6 inches of the this to make 1 crate. It may be easier to just buy 3/16" x 3/32" but this is what I had at home. |
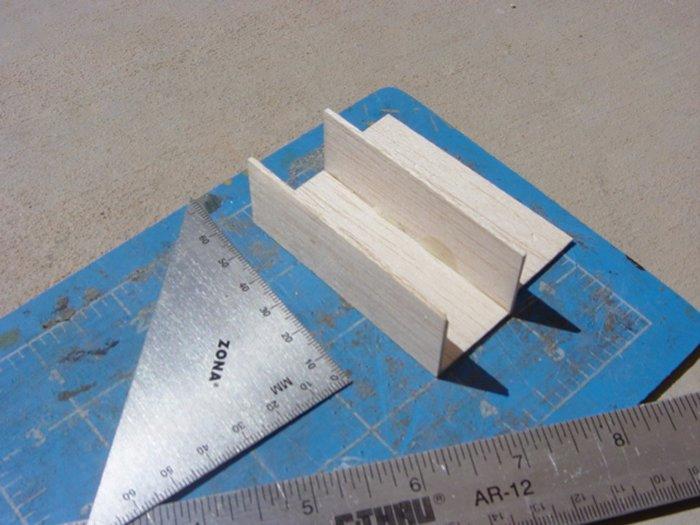
| Make sure all your wood pieces are the same length and square I bundled them togeather and sanded all of them down at the same time. Glue two sides to a bottom as shown. make sure everything is square. Take a break and let it dry for awhile |

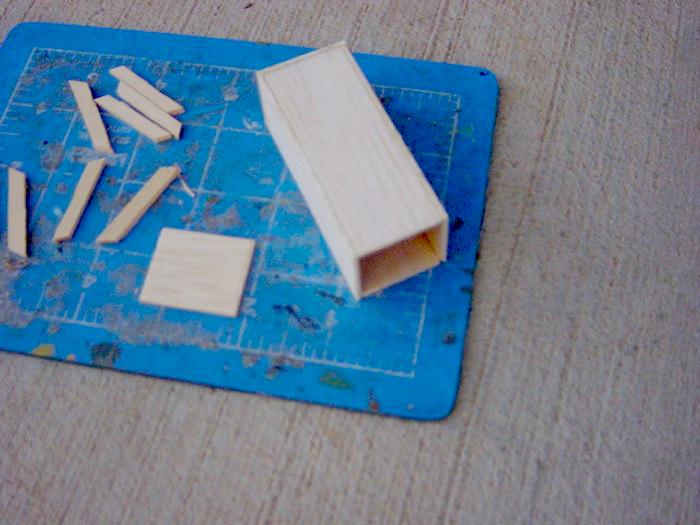
| Glue on one end ( I use Elmers Carpenters glue, use whatever you prefer) |
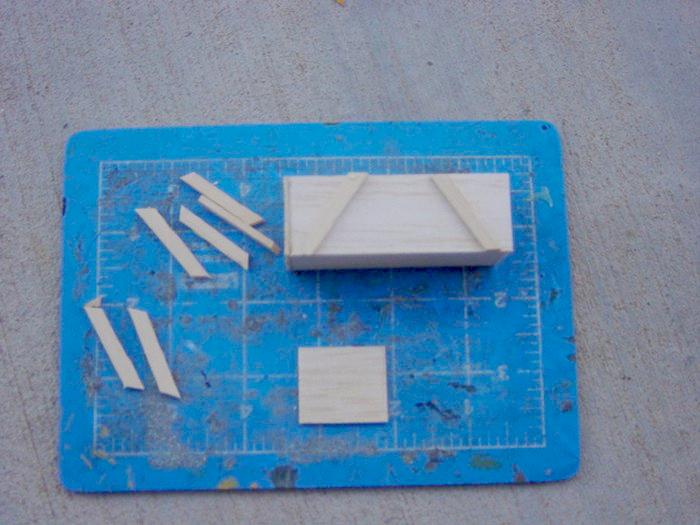
| Get your Strips of 3/16" x 3/32" wood and cut them into braces as shown you will need 4. |
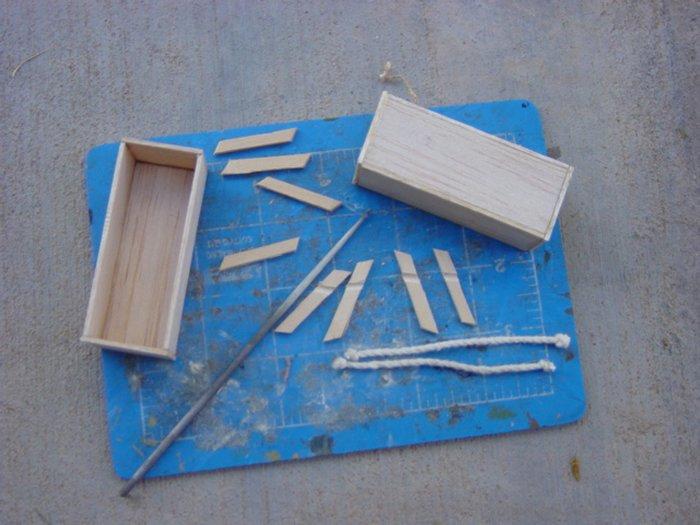
| Get some string about 1/16" thick for the rope handles tie two knots 3 inches apart cut it off at the end of the knot leave just enough to keep the knots fron unraveling file a channel into each of the braces as shown, note there are two different orientations of the channels the channel should be closer to one end than the other as shown. The channel is the proper depth when you can set it onto a flat surface and draw the rope through it with a little bit of resistance. |
| Glue the braces onto the sides as shown with the rope handles held inplace by the braces one channel should be high the other low like in the picture. it will be the same on the other side the rope handle will go through one low channel and one high channel. You will need to clamp the braces into place while they dry or just hold them with a little pressure if you don't have little clamps. Glue the last end piece on (This could have been done any time after step #5) |
| If you are somewhat crazy you can add nails by pushing a piece of soft wire into the balsa wood and trimming it off flush with wire cutters. I use a Model rail road track nail chucked into a hand drill to start the 'nail holes' |
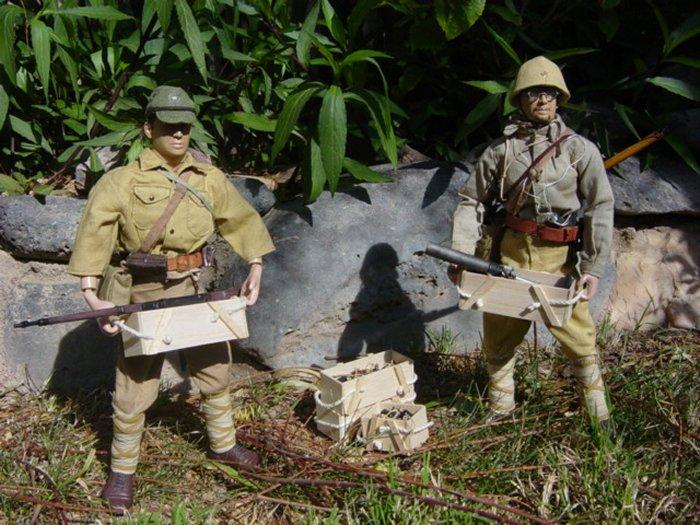
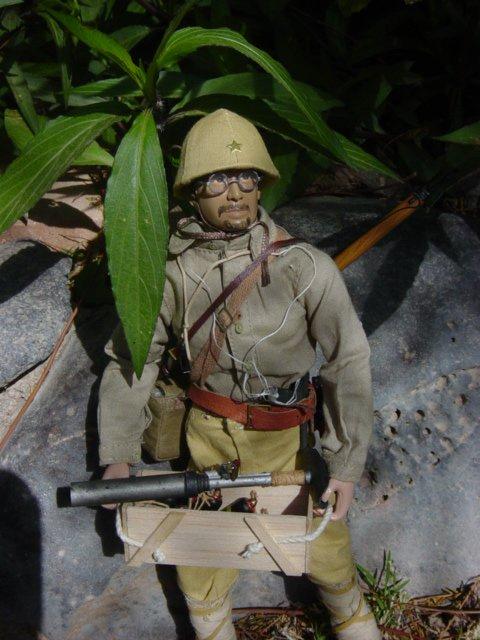
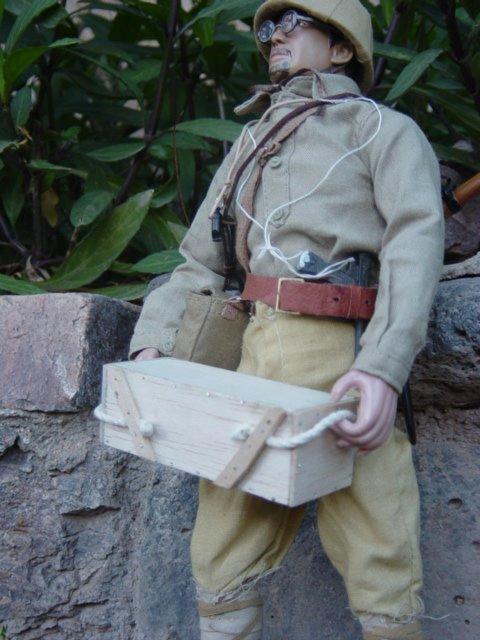
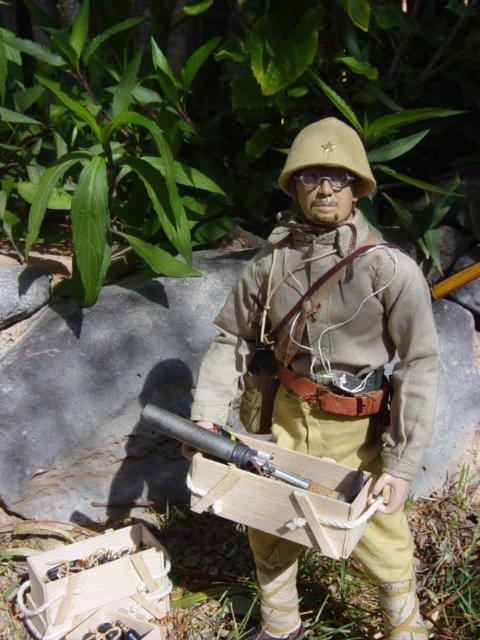
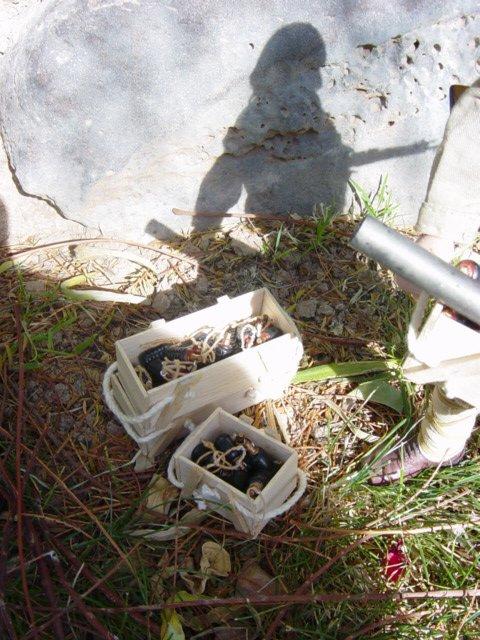
| Here are some other pictures of my crates with grenades, knee-mortar bombs and a Knee-Mortar. These crates will be great for collectors of Japanese figures or useful for PTO dioramas. |
| Now this should be a handy tip old buddy. My Japanese figures could definitely use some these. The process looks fairly simple too. A real cool tip BC. Thanks for sending it in and sharing it with us. - GL |

Back to the Tips